Windows 10 은 Microsoft에서 가장 기대하는 Windows 버전 중 하나입니다. Windows 8은 Desktop OS의 세계에서 새로운 트렌드를 만들었지 만 Windows 10에서 Microsoft의 주요 초점이었던 디자인 및 성능에 몇 가지 문제가있었습니다. 따라서 Windows 10 Final Build는 2015 년 7 월 29 일에 데스크톱 용으로 뿐만 아니라 스마트 폰.
Windows 8의 결함을 고려하여 많은 수정이 포함되었습니다. 실제로 Windows의 고급 버전이지만 여전히 매일 다른 사용자에게 발생 하는 많은 결과 가 있습니다.
이러한 결과의 주요 부분은 특정 작업을 수행하려고 할 때 발생하는 오류입니다. 많은 사람들이 Windows 10 내에서 다른 소프트웨어와 브라우저를 열려고 시도하는 동안 오류 메시지를 받았습니다.이 오류는 응용 프로그램을 올바르게 시작할 수 없습니다 (0xc0000005) 라는 오류 메시지와 함께 제공됩니다 . 확인을 클릭하여 응용 프로그램을 닫습니다 . 이 오류는 일반적으로 인터넷 브라우저에서 발생 하지만 이에 국한되지는 않습니다. 이 오류로 인해 Windows 내부의 모든 응용 프로그램이 응답을 중지 할 수 있습니다. 따라서 필수 소프트웨어를 다시 작동 시키려면 수정해야합니다.

11/12/2016 : 사용자는 아래 나열된 방법이 Windows 7에서도 작동한다고보고했습니다.
Windows 10 오류 0xc0000005의 원인 :
이 오류가 Windows 10에서 다양한 소프트웨어의 작동을 방해하는 원인은 여러 가지가 있습니다. 주요 원인으로 간주되는 이유 중 하나는 실행 파일과 충돌을 일으키고 작동에 영향을 미치는 타사 바이러스 백신 프로그램 입니다. 다른 한편 으로 프로그램이 비정상적으로 작동하는 맬웨어 및 바이러스 로 인해 레지스트리 가 손상 될 수 있습니다 . 때로는 잘못된 하드웨어 드라이버 가이 오류의 원인이 될 수도 있습니다.
Windows 10 오류 0xc0000005 수정 솔루션 :
위에서 언급 한 이유에 따라 솔루션은 간단합니다. 따라서 다음 방법을 통해이 실망스러운 오류 메시지를 제거하십시오.
손상된 시스템 파일 복구
Restoro를 다운로드하고 실행하여 여기 에서 손상되거나 누락 된 파일을 스캔하고 복원 한 후 아래 솔루션을 진행 하십시오 . 아래 솔루션을 진행하기 전에 모든 시스템 파일이 손상되지 않았는지 확인하는 것이 중요합니다.
방법 # 1 : 바이러스 백신 프로그램 수정
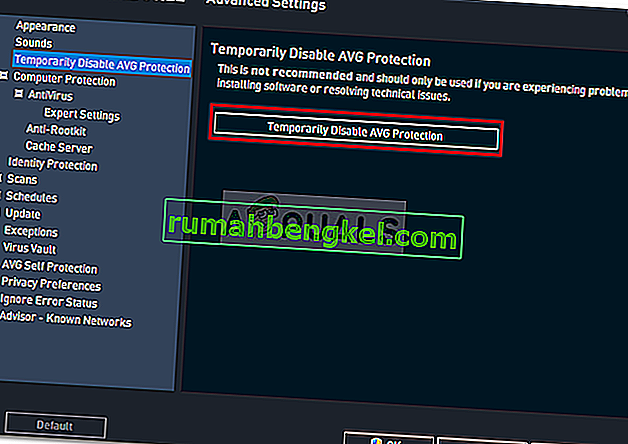
바이러스 백신 프로그램은 여러 프로그램의 실행 파일에 영향을 줄 수 있습니다. 따라서이 문제를 해결하려면 타사 바이러스 백신 프로그램을 비활성화하여 범인인지 여부를 확인해야합니다. 바이러스 백신 프로그램을 비활성화하면 인터넷에 연결되어있을 때 컴퓨터에 심각한 위협이 발생할 수 있습니다.
Windows 자체 보안 소프트웨어 인 Windows Defender를 사용할 수도 있습니다 . 다른 바이러스 백신과 기능이 동일합니다. 설정 으로 이동하여 보호막을 해제하여 바이러스 백신을 비활성화 할 수 있습니다 .

비활성화 된 후 오류를 다시 확인하십시오. 여전히 지속되면 다음 방법으로 이동하십시오.
방법 # 2 : 레지스트리 수정
레지스트리는 끊임없이 실행해야한다는 것이 여러 파일 및 설정을 읽을 도움말을 귀하의 PC에서 사용중인 윈도우의 중앙 데이터베이스입니다. 모든 것을 제자리에 쌓는 데 필요한 일부 특정 파일의 손상으로 인해 레지스트리가 손상 될 수 있습니다. 따라서 대부분의 전문가는 레지스트리를 백업하고이 백업을 기존 USB 스틱에 보관하여 손상된 경우 레지스트리를 이전 상태로 되 살릴 수 있도록 권장합니다. 그러나 레지스트리를 백업하지 않은 경우 다음 단계에 따라 레지스트리를 수정하여 오류 0xc0000005 를 해결하십시오 .
1. 이 링크 에서 레지스트리 클리너 소프트웨어를 다운로드 합니다 .
2. 다운로드 후 권장 설정을 사용하여 설치합니다. 설치 프로세스가 완료된 후 소프트웨어를 엽니 다.
3. 인터페이스 에서 왼쪽 창 에있는 레지스트리 탭을 클릭하고 문제 검색으로 표시된 버튼을 클릭합니다 . 레지스트리에서 오류 검색을 시작하고 검색이 완료되면 Fix Selected Issue 버튼 이 활성화됩니다. 해당 버튼을 클릭하면 모든 것이 수정됩니다.

방법 # 3 : 결함이있는 드라이버 수정
드라이버 는 컴퓨터가 연결된 하드웨어와 통신 할 수 있도록 도와주는 소프트웨어 프로그램입니다. 따라서 손상되면 하드웨어가 결함 을 일으키는 경향이 있습니다 . 이 결함이있는 다이버를 고치는 것은 여러 가지 방법으로 당신을 도울 수 있습니다. 아래 단계를 따르십시오.
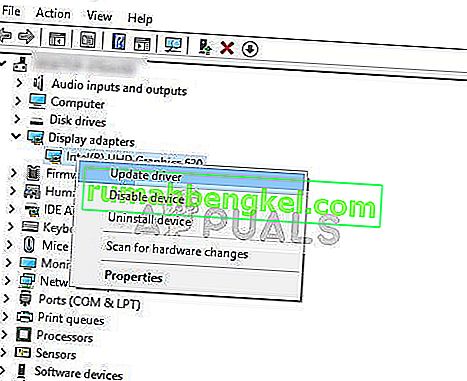
1. Win + X 를 누르고 목록에서 선택 하여 장치 관리자 를 엽니 다 .
2. 장치 관리자에서 아래로 스크롤하여 노란색 표시가있는 하드웨어가 있는지 확인합니다. 있는 경우 마우스 오른쪽 버튼으로 클릭하고 드라이버 소프트웨어 업데이트를 선택 합니다. 최근에 드라이버를 설치 한 경우 해당 드라이버도 다시 설치하십시오.

3. 다음에 나타나는 창 에서 업데이트 된 드라이버 소프트웨어 자동 검색을 클릭하여 드라이버를 자동으로 검색하고 설치합니다. 드라이버를 수동으로 다운로드 한 경우 아래 옵션을 클릭하여 찾아서 설치하십시오. 프로세스가 완료되면 오류를 확인하십시오.

방법 # 4 : BCD 수정
이 방법은 사용자 자신의 책임하에 수행해야합니다. 이것은 일부에게는 효과가 있었지만 일부에게는 그렇지 않았습니다. 이 가이드의 단계를 수행 한 후 Windows를 다시 정품 인증해야합니다.
- 홀드 Windows 키 와 보도 X를 . 명령 프롬프트 (관리자) 선택
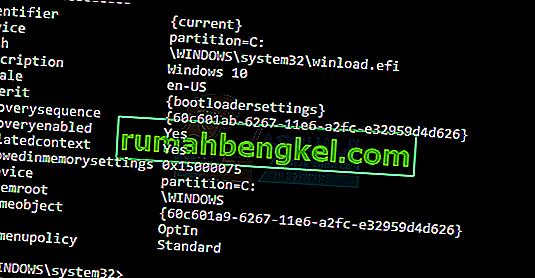
- " bcdedit" 를 입력하고 Enter 키를 누릅니다. Windows 부팅 로더 경로가 xOsload.exe 인 경우 일부 파일을 제거하고 BCD를 복구해야합니다. " bcdedit"명령 을 실행 한 후 PATH 필드에서 확인할 수 있습니다 .
- 완료되면 아래 명령을 실행하면 일부는 찾을 수 없음을 반환하지만 오류를 무시하고 마지막까지 계속 진행할 수 있습니다. 각 명령 후 Enter 키를 눌렀는지 확인하십시오.

Del D : \ Windows \ System32 \ xOsload.exe Del D : \ Windows \ System32 \ xNtKrnl.exe Del D : \ Windows \ System32 \ Drivers \ oem-drv64.sys attrib c : \ boot \ bcd -h -r -s ren c : \ boot \ bcd bcd.old bootrec / rebuildbcd
방법 5 : Windows 업데이트 확인
Windows 업데이트에는 종종 일부 버그 및 결함에 대한 수정 사항이 포함되어 있지만 사람들의 컴퓨터에서 새로운 문제를 해결하는 것으로도 유명합니다. 그러나이 단계에서는 Microsoft가 업데이트에서 발생하는 모든 문제를 패치하는 경우가 많기 때문에 운영 체제에 대한 업데이트가 있는지 확인합니다. 이를 위해 아래 가이드를 따르십시오.
- 보도는 "윈도우 ' + "나 " Windows 설정을 엽니 다.
- 설정에서 "업데이트 및 보안" 옵션을 클릭 하고 왼쪽에서 "Windows 업데이트" 옵션을 선택합니다.
- 다음 화면에서 "업데이트 확인" 옵션 을 클릭하면 Windows에서 사용 가능한 업데이트를 확인하라는 메시지가 자동으로 표시됩니다.

- 업데이트 확인이 완료된 후 "다운로드" 버튼을 클릭하여 컴퓨터에 새 업데이트를 다운로드하고 설치합니다.
- 이러한 업데이트를 설치 한 후 컴퓨터의 문제가 해결되었는지 확인하십시오.


방법 6 : 컴퓨터 복원
If you have just started getting this issue, it might be getting triggered due to a faulty driver installation or even due to a rogue application that you might’ve installed on your computer recently. Therefore, in this step, we will be reverting the state of the computer to an earlier date and hopefully, this should get our issue fixed if it was due to the above-stated reasons. In order to do this:
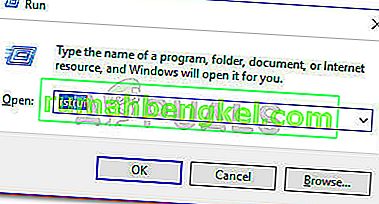
- Press “Windows” + “R” to open the Run prompt.
- Type in “rstrui” and press “Enter” to open the restore management window.
- Click on “Next” and check the “Show more Restore Points” option.
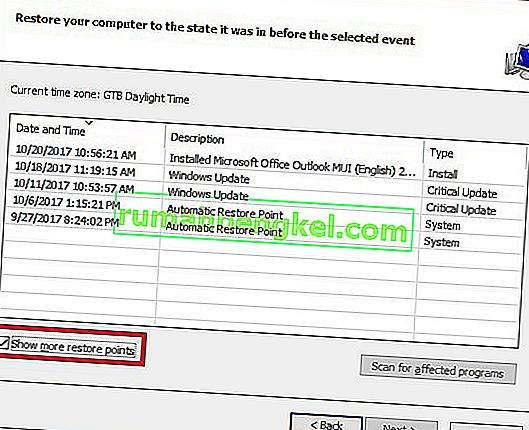
- Select a restore point from the list that is before the date on which this issue started occurring.
- Click on “Next” again and follow the on-screen instructions to revert everything back to the selected date.
- After the restore is completed, check to see if the issue still persists.


Method 7: Enable Firewall
It is possible in some cases, that the error is being triggered because the application is suspicious or at least if it has been marked suspicious and the Windows Firewall isn’t running on your computer to validate this suspicious. Therefore, in this step, we will be making sure that the Windows Firewall is enabled in order to get rid of this error. For that:
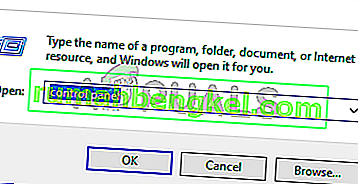
- Press “Windows” + “R” to open the Run prompt.
- Type in “Control Panel” and press “Enter” to launch the classical Control Panel interface.
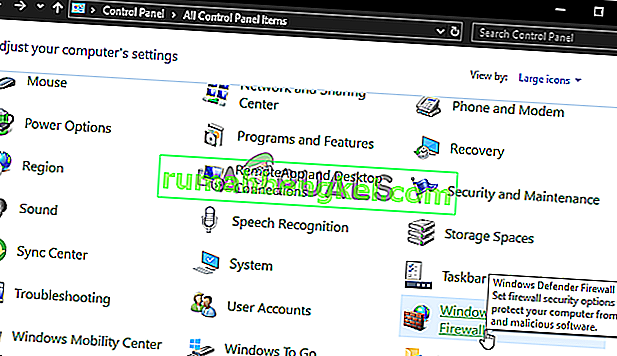
- In the Control Panel, click on the “ViewBy:” option and select the “Large Icons” button.
- After making this selection, click on the “Windows Defender Firewall” option to launch the Firewall and then select the “Turn Windows Defender Firewall On or Off”.
- Make sure to check the “Turn on Windows Defender Firewall” for both the available options to turn the Firewall on.
- After making this selection, save your changes and close out of the Window.
- After doing so, check to see if the issue still persists.


Method 8: Run SFC Scan
In some situations, you might’ve installed a bad driver on your computer or at some point, due to a storage failure, some system files or drivers might’ve been corrupted. Therefore, in this step, we will be running a complete system scan to identify any drivers that are missing signatures or to fix any abnormalities in the system files. For that:
- Press “Windows’ + “R’ to open the Run prompt.
- Type in “cmd” and then press “Shift’ + “Ctrl” + “Enter” to provide admin permissions.Running the Command Prompt
- Type in the following command inside the command prompt and press “Enter” to execute it.
sfc /scannow
- Let the computer scan for any broken or corrupted items and it should automatically replace them with working ones.
- Check to see if doing so fixes the error message.

Method 9: Disabling Data Execution Prevention
Data Execution Prevention is a program that prevents certain programs or executables from being able to run on your computer because it suspects that they might be viruses. Due to this prevention, sometimes, as a false alarm, legit applications might also face issues while trying to run on your computer. Therefore, in this step, we will be disabling this setting from the system configuration panel. For that:
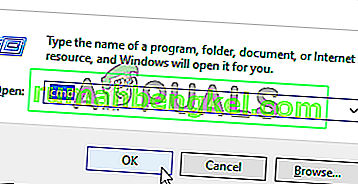
- Press ‘Windows’ + “R’ to open the Run prompt.
- Type in “Control Panel” and press “Enter” to launch the classical control panel interface.

- Inside the Control Panel, click on the “View By:” icon and then select the “Large Icons” option.
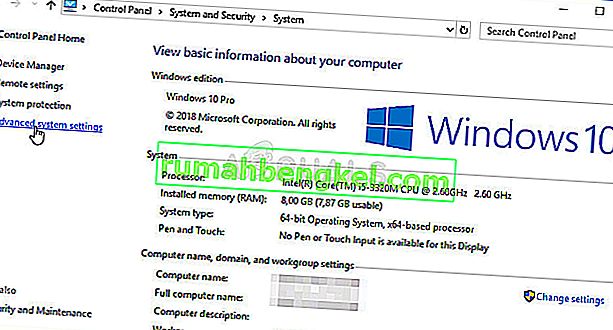
- After selecting Large Icons, select the “System” option.
- Click on the “Advanced System Settings” option on the left side of the screen.
- In the advanced System Settings, click on the “Advanced” tab from the top.
- In the advanced tab, click on the “Settings” option under the “Performance” heading.
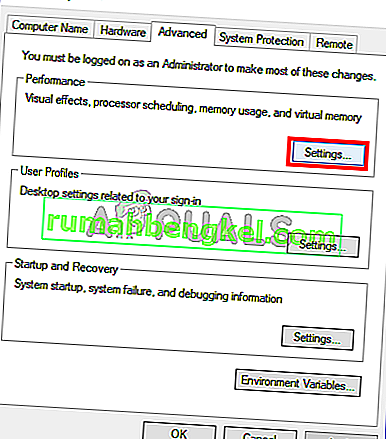
- On the next window that opens up, click on the “Data Execution Prevention” tab, and then select the “Turnon DEP for all programs except thoseI Select” option.
- After that, click on the “Add” option and point to the executable of the application that you are facing issues with.
- This way, that application will no longer come under the jurisdiction of the DEP program.
- Check to see if doing so has fixed the issue.


If the above process is unable to fix the issue, it might be because the executable isn’t the only one being affected by the DEP program. Sometimes the DEP might actually be preventing a herd of executables from being run on the computer and to counter this we will be disabling DEP completely.
Disabling DEP completely cannot be done through any Windows setting and it needs to be done manually through the command prompt. Remember to take this step as a last resort because this can in some cases makes your computer more vulnerable to viruses and malware attacks. In order to disable DEP through the command prompt:
- Press “Windows” + “R’ to open the Run prompt.
- Inside the Run prompt, type in “cmd” and then press “Shift” + “Ctrl” + “Enter” to launch in admin mode.
- Inside the command prompt, type in the following command and press “Enter” to execute it on your computer.
bcdedit.exe /set {current} nx AlwaysOff - Once the command has been executed, run the application that you want to and check to see if the error message still persists.
Method 10: Disable Firewall and Windows Defender
In some situations, the executable that you want to run on the computer might actually be blocked by the Firewall and it would not be able to make contact with its servers this way. Therefore, we will have to allow the executable in our Firewall for both public and private networks which should get it working if the Firewall is preventing it.
In addition to that, sometimes the Windows Defender might prevent the application from running on your computer because its local files might be suspicious and not properly signed. This can be due to a false alarm as well so we will be disabling the Windows Defender for the application as well by adding an exclusion. In order to do that:
- Press “Windows” + “R” to launch the Run prompt.
- Type in “ControlPanel” and press “Enter” to launch the classical control panel interface.
- Click on the “View by:” button, select “Large Icons” and then click on the Windows Defender Firewall option.
- Select the “Allow an app orfeature through the Firewall” button on the left pane and then click on the “Change Settings” button and accept the prompt.
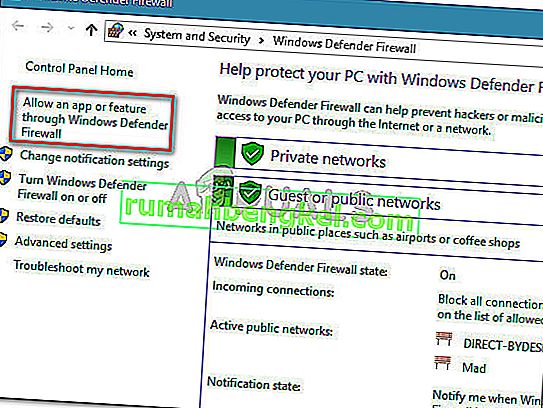
- From here, make sure that you check both the “Public” and the “Private” options for the application and its entries.
- Save your changes and exit out of the window.
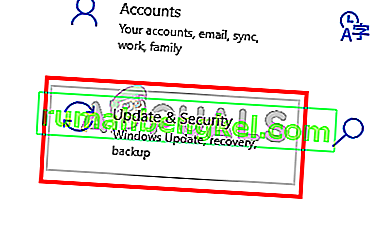
- After that, press “Windows” + “I” to launch the settings and click on the “Updateand Security” option.

- From the left pane, click on the “Windows Security” button and then click on the “Virus and Threat Protection” button.
- Select the “Manage Settings” button under the Virus and Threat Protection Settings heading.
- Scroll down and click on the “Add or Remove Exclusions” button in the next window.
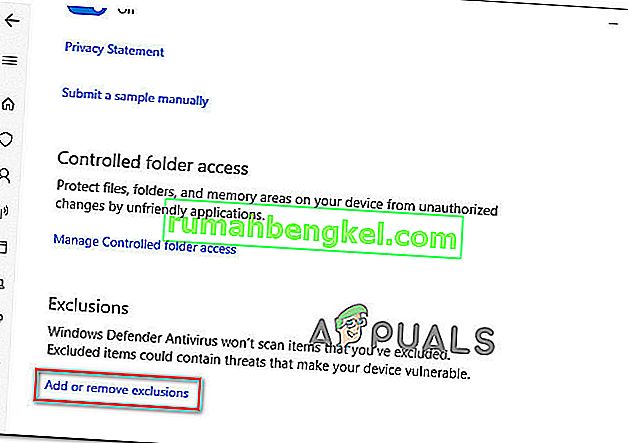
- Click on the “Add an Exclusion” option and select “Folder’ from the File type.
- Make sure to specify the application’s folder with which the issue is occurring and exit out of this window after saving your changes
- Check and see if doing so has fixed the error message.


Method 11: Reinstall Firefox
If you are getting this error while trying to launch Firefox, it might be occurring because the applications haven’t been installed properly on your computer. Therefore, in this step, we will be launching the app management window and uninstalling Firefox after which we will reinstall it completely by downloading it from the Firefox website. For that:
- Press “Windows” + “R” to open the Run prompt.
- Type in “appwiz.cpl” and press “Enter” to open the app management window.

- In the app management window, scroll down and right-click on the “Firefox” application.
- Select “Uninstall” from the list and then follow the on-screen instructions to remove the software from your computer.
- Repeat this step for all instances and bundled applications of the software installed on your computer.
- Make sure to disable any third-party antiviruses at this point to make sure that the software is installed smoothly.
- Head on over to the Mozilla website and click on the download button.

- Click on the downloaded executable and install it on your computer following the on-screen instructions.
- Check to see if doing so has fixed the error message on your computer.


Method 12: Scanning for Malware
It is possible in some cases that the computer has acquired malware that is preventing the user from being able to run all the system functions on their computer. Therefore, in this step, we will be using the default Windows Defender to scan our computer thoroughly for any viruses or malware that might’ve found its way on our computer. For that:
- Press the “Windows” + “I” keys simultaneously on your PC to open the Settings tab.
- Navigate to the Update& Security option and then click on the “Windows Security” button on the left tab.
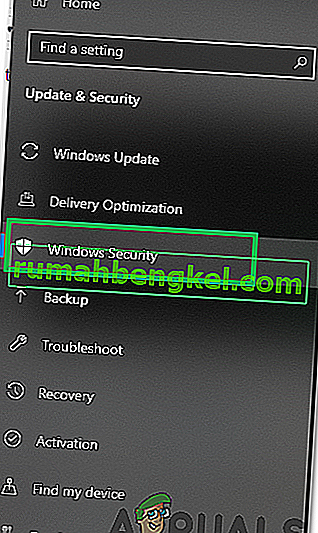
- After that, click on the “Open Windows Security” and select the “Virus and Threat Protection” option.
- After that, click on the “Scan Options” button below the “Quick Scan” window.
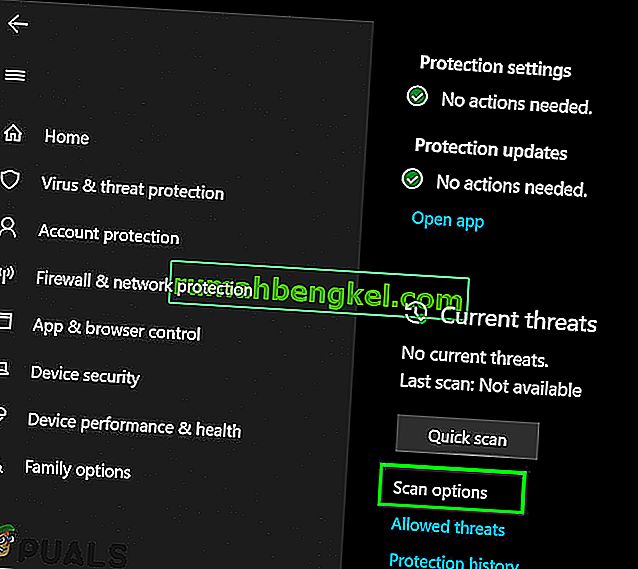
- Click on the “Full Scan” option and then hit the button of “Scan Now”.
- Wait for a few seconds while this process gets completed and then finally check if the error gets resolved now.


Microsoft Security Scanner is an additional tool that you can use to test the system for any further viruses and malware because sometimes the default tool isn’t able to perform the scan properly. Therefore, in this step, if the issue still hasn’t been resolved, we will be using the Microsoft Security Scanner to further make sure for any issues.
- Launch your browser and download the Microsoft Security Scanner from here.
- After downloading the executable, run it on your computer and let it install.
- Accept the License Agreement terms and click on “Next”.

- Select “Full Scan” and click on “Next”.
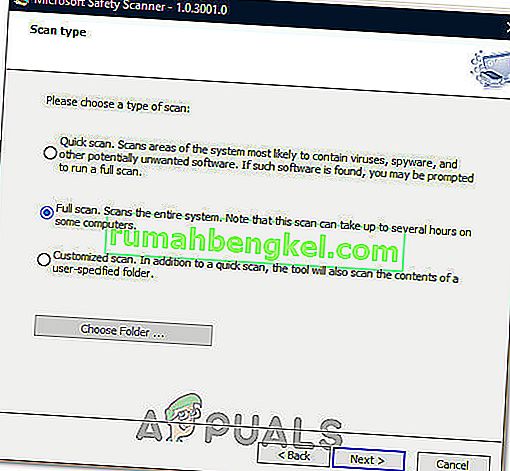
- After you opt for a full scan, the software will start scanning your entire computer to look for any malware or viruses that might’ve disguised themselves as normal executables or applications.
- After this scan has been finished, check to see if the error message still persists.


Method 13: Install Missing Drivers
It is possible in some situations that your device is missing certain drivers due to which this particular issue is being triggered on your computer. Therefore, we will be checking for any missing drivers and then we will check to see if the error is fixed. In order to do this, follow the guide below.
- Download Driver Easy on your computer.

- Run the downloaded executable and install the software on your computer.
- Run the check and see if there are any missing drivers on your computer.
- Install these missing drivers and then install them either manually or automatically using the Software.
- After installing all the missing drivers, check to see if the issue still persists.

Method 14: Reconfigure Registry
It is possible that in some cases, you haven’t properly configured all the registry settings or that you unknowingly configured something incorrectly. Therefore, in this step, we will be reconfiguring our Registry to fix a certain key that sometimes, if misconfigured, causes this particular error on Windows. In order to do this, follow the guide below.
- Press “Windows” + “R” to open the Run prompt.
- Type in “regedit” and press “enter” to launch the registry editor.

- Inside the registry editor, navigate to the following location.
HKLM\SOFTWARE\Microsoft\Windows NT\CurrentVersion\Windows\AppInit_Dlls
- Double click on the “LoadAppInit_DLLs” entry on the right side of the screen.
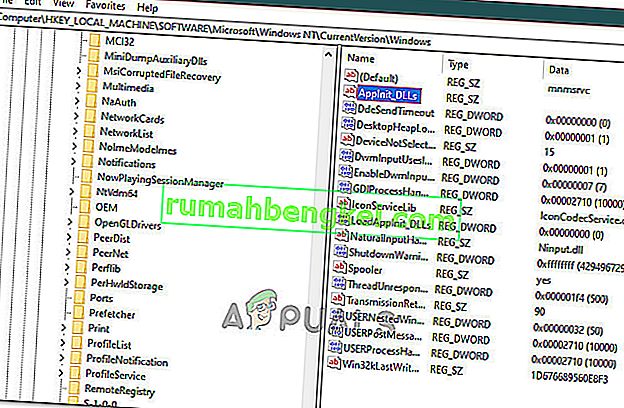
- Change the value of this registry from “1” to “0”.
- Save your changes and exit the registry editor.
- Check to see if doing so has fixed the error.


Method 15: Update Disk Drivers
In some cases, the Disk Drivers that are being used to control your Storage and other Disks installed on the computer might have been outdated due to which the error is being triggered. Therefore, in this step, we will first be opening the Device Management Window and from there, we will be updating these drivers. In order to do so, follow the steps mentioned below.
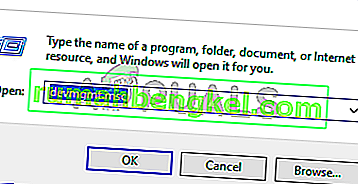
- Press “Windows’ + “R” to open the Run prompt.
- Type in “Devmgmt.msc” and press “Enter” to launch the device management window.
- In the Device Manager, double click on the “DiskDrives” option to expand it.
- Right-click on the storage device listed and select the “Update Driver” option.
- Select the “Search Automatically for Drivers” option and let the setup search.
- If there are any drivers available, Windows will automatically check for them and install them on your computer.
- Check to see if doing so has fixed the issue.


Method 16: Disabling Automatic Updates and Uninstalling Updates
It is possible in some cases, that this error is stemming from a faulty update install. Microsoft is notorious for pushing out updates that aren’t properly customized to work for all hardware combinations and often go on to break things instead of making them better. Therefore we will make sure that the recent update isn’t installed on our computer.
In order to do this, we will have to first disable automatic updates on our computer and then we will be uninstalling the recently installed updates. Make sure to back up any important data that you don’t want to lose just in case this goes bad.
- Press “Windows” + “R’ to open the Run prompt.
- Type in “service.msc” and press “Enter”.

- Scroll through the list and double click on the “Windows Update” service.
- Click on the “Stop” button and then click on the “Startup Type” dropdown.
- Select “Disabled” from the list and select the “Apply” button from the window.
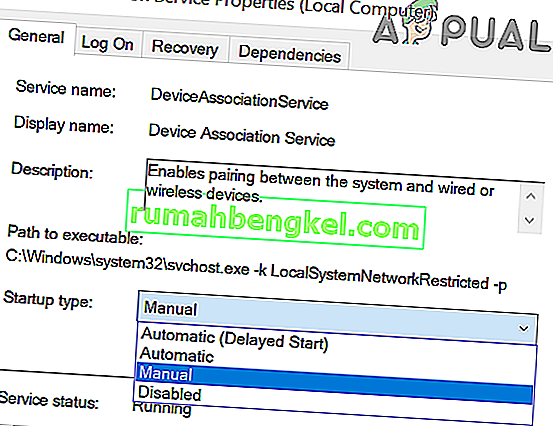
- Click on “OK” to close out of this window.
- Check to see if doing so has stopped your computer from updating.


After stopping the computer from updating, we will now be uninstalling the recent updates that have been installed on your computer. For that:
- Press “Windows” + “I” buttons to open the settings.
- In settings, click on the “Update and Security” option and then select the “Windows Update” button from the left pane.

- In the Windows Update, click on the “View Update History” option.
- In the Update History, click on the “Uninstall Updates” option and it should take you to the uninstallation screen where all the recently installed updates will be listed.
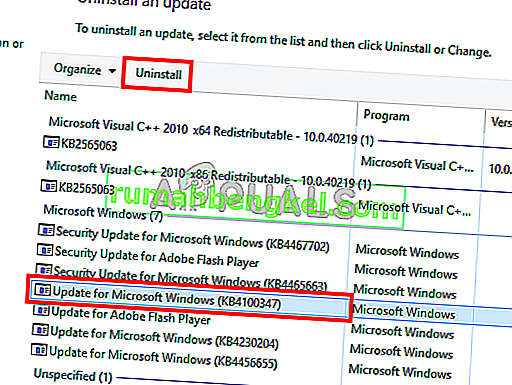
- From the list, right-click on the update that was installed recently and caused this error on your computer.
- Right-click on this update and select the “Uninstall” button to remove it completely from the computer.
- Follow through with the on-screen instructions.
- Check to see if uninstalling has fixed this issue.


Additional Fixes:
- In addition to some of the recommendations given above, you should try to check if there are any bad memory modules (RAM) installed on your computer which can be a cause of this.
- 또한 RAM을 권장 제한을 초과하는 수준으로 오버 클럭하지 않았는지 확인하십시오. 그렇게 한 경우 공장 기본값으로 되돌리고 문제가 해결되는지 확인하십시오.