사용자는 일반적으로 WU (Windows Update) 를 통해 Windows 10을 업데이트하려고 시도한 후이 문제가 발생합니다 . 오류 0x8024a105자동 업데이트 구성 요소에 문제가 있음을 나타 냅니다.일반적으로 업데이트가 실패하면 사용자에게 다음 메시지가 표시됩니다.
“일부 업데이트를 다운로드하는 데 문제가 있었지만 나중에 다시 시도하겠습니다. 이 메시지가 계속 표시되면 웹을 검색하거나 지원팀에 문의하여 도움을 받으세요. 이 오류 코드가 도움이 될 수 있습니다 : (0x8024a105).”

현재이 문제로 어려움을 겪고있는 경우 귀하와 유사한 상황에있는 사용자를 성공적으로 도왔던 몇 가지 실행 가능한 수정 사항을 확인했습니다. 문제를 해결할 수있는 해결책을 찾을 때까지 아래의 각 방법을 순서대로 따르십시오.
방법 1 : Windows 업데이트 문제 해결사 실행
Windows 업데이트 문제 해결사를 실행하여 간단하게 시작하겠습니다 . 일부 사용자는 기본 제공 문제 해결사가 손상된 구성 요소를 자동으로 수정하도록 허용하여 업데이트를 허용했습니다. 다음은 Windows 업데이트 문제 해결사 를 실행하는 방법에 대한 빠른 가이드입니다 .
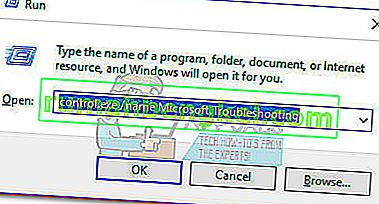
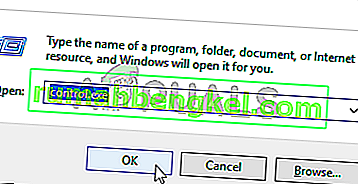
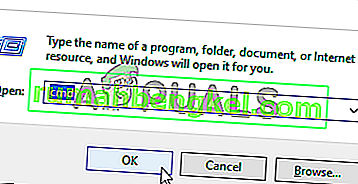
- 를 눌러 윈도우 키 + R 실행 창을 엽니 다. 다음을 입력하거나 붙여 넣으십시오.
control.exe / name Microsoft. 문제 해결
기본 제공 문제 해결사를 열려면 Enter 키 를 누르 십시오 .
- 에서 문제 해결 창을 클릭 Windows Update에서 다음을 클릭합니다 실행 문제 해결사를 .
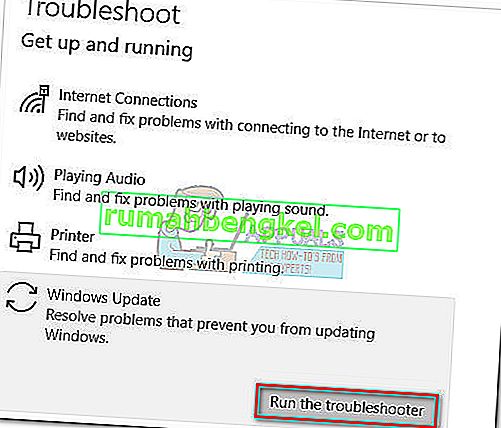
- 문제 해결사가 업데이트 클라이언트의 문제를 감지 할 때까지 기다리십시오. 문제를 식별 할 수 있으면 화면의 지시에 따라 자동 복구를 트리거합니다. 일반적 으로이 수정 사항 적용 을 선택하기 만하면 됩니다.
- 경우 업데이트 문제 해결사 가 수리 아무것도 관리보고, 컴퓨터를 다시 시작하고 문제가 다음 시작시 해결되었는지 확인합니다.


0x8024a105 오류로 인해 업데이트가 여전히 실패 하면 방법 2 로 이동하십시오 .
방법 2 : UAC (사용자 계정 컨트롤) 설정 변경
문제 해결사가 문제를 자동으로 해결하지 못한 경우 문제가 사용자 계정 컨트롤 설정에 의해 생성되지 않았는지 확인 합니다. 로그인 한 계정에 필요한 권한이 없기 때문에 일부 업데이트가 0x8024a105 오류 와 함께 실패했습니다 . 계정 과 관련된 사용자 계정 권한을 관리자 로 변경하여이 문제를 쉽게 해결할 수 있습니다 . 다음은이를 수행하는 빠른 가이드입니다.
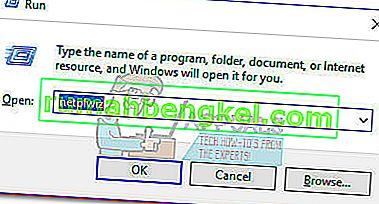
- 를 눌러 윈도우 키 + R 실행 창을 엽니 다. “ netplwiz ”를 입력하거나 붙여넣고 Enter 키 를 눌러 기본 제공 문제 해결사를 엽니 다.
- 에서 사용자 탭, 당신이 사용하고있는 사용자를 선택하고 클릭 속성.
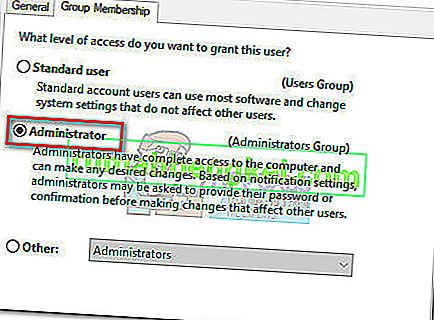
- 에서 속성 창으로 이동 그룹 구성원 과 액세스 수준 설정 관리자 . 히트 적용 하여 변경 사항을 저장합니다.
 참고 : 액세스 수준이 이미 관리자로 설정된 경우 방법 3 으로 직접 이동하십시오 .
 - 컴퓨터를 재부팅하고 동일한 사용자 계정으로 로그인했는지 확인하십시오. 시작이 완료되면 업데이트를 다시 수행하십시오. 0x8024a105 오류 로 인해 실패 하면 세 번째 방법으로 이동하십시오.

 참고 : 액세스 수준이 이미 관리자로 설정된 경우 방법 3 으로 직접 이동하십시오 .
방법 3 : Windows 업데이트 구성 요소를 수동으로 재설정
위의 방법이 실패한 것으로 판명되면 Windows 업데이트 구성 요소 를 수동으로 재설정 한 다음 Windows 업데이트 프로세스 를 다시 시작할 수밖에 없습니다 . 네 가지 주요 방법 중이 방법은 성공 확률이 높지만 더 많은 조정이 필요합니다.
다음은 Windows 업데이트 구성 요소를 재설정하는 빠른 가이드입니다.
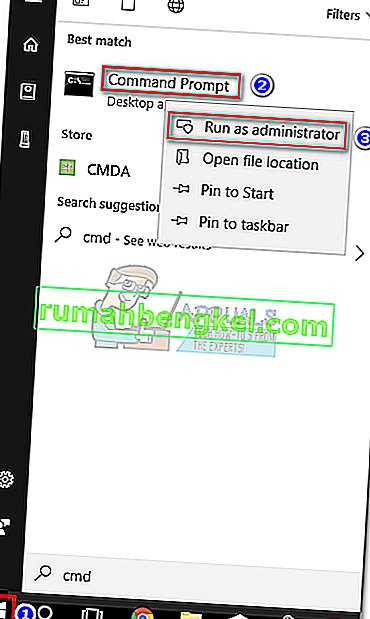
- Windows 시작 표시 줄 (왼쪽 하단 모서리)을 클릭하고 " cmd "를 검색합니다 . 그런 다음 명령 프롬프트를 마우스 오른쪽 버튼으로 클릭 하고 관리자 권한으로 실행을 선택합니다 .
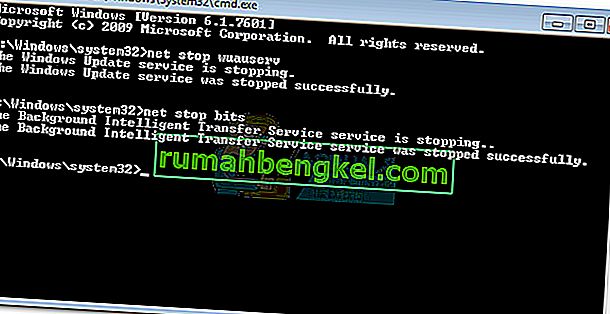
- 에서 상승 된 명령 프롬프트, 우리의 서비스를 중지하려고하는 MSI 설치, 윈도우 업데이트, BITS 및 암호화를 . 이를 수행하려면 다음 명령을 삽입하고 각 명령 뒤에 Enter를 누르십시오.
net stop wuauserv net stop cryptSvc net stop bits net stop msiserver
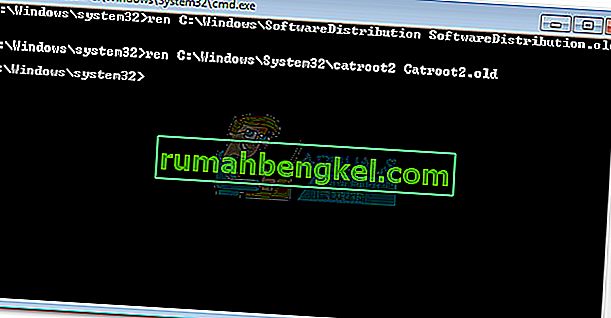
- 모든 서비스가 중지되면 Windows Update에서 해당 구성 요소를 다시 시작하도록 SoftwareDistribution 폴더와 Catroot2 폴더 의 이름을 변경해 보겠습니다 . 두 명령을 관리자 권한 명령 프롬프트에 붙여 넣거나 입력하고 각 명령을 입력 한 후 Enter 키를 누릅니다.
ren C : \ Windows \ SoftwareDistribution SoftwareDistribution.old
ren C : \ Windows \ System32 \ catroot2 Catroot2.old
- 두 폴더의 이름이 변경되면 MSI 설치 관리자, BITS, 암호화 및 Windows 업데이트의 서비스를 다시 시작해야합니다. 이렇게하려면 명령 프롬프트에 다음 명령을 입력 하고 각 명령 다음에 Enter 키 를 누르 십시오 .
net start wuauserv net start cryptSvc net start bits net start msiserver
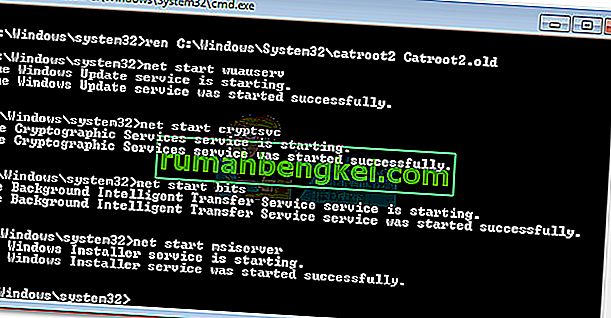
- 서비스가 다시 시작되면 관리자 권한 명령 프롬프트를 닫고 컴퓨터를 재부팅합니다.


방법 4 : 소프트웨어 배포 폴더 삭제
경우에 따라 Powershell을 사용하여 폴더를 삭제하는 것만으로 문제를 해결할 수 있습니다. 따라서이 단계에서는 먼저 PowerShell을 관리자로 실행 한 다음 소프트웨어 배포 폴더를 삭제하여 업데이트 프로세스를 시작합니다. 그에 대한:
- 보도 "윈도우" + "X" 버튼을 동시에하고 선택 "파워 쉘 (관리자)" 옵션을 선택합니다.
- 다음 명령을 입력 하고 "Enter" 를 눌러 실행합니다.
net stop wuauserv
- 다시 다음 명령을 입력하고 " Enter "를 누릅니다.
순 정지 비트
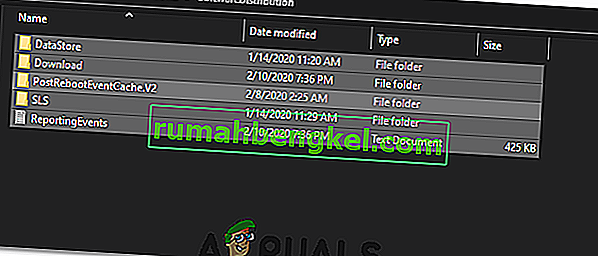
- 마지막으로 다음 폴더로 이동합니다.
C : \ Windows \ SoftwareDistribution
- 를 눌러 "Ctrl 키" + "A"는 폴더와 언론의 모든 내용 선택 "시프트" + "델" 영구적으로 삭제 버튼을 누릅니다.
- 확인 과정을 완료하려면 컴퓨터를 다시 부팅 한 후이 파일을 삭제에 대해 경고 어떤 지시를합니다.
- 이제 업데이트 하고 문제가 지속되는지 확인 하십시오.

컴퓨터가 백업되면 0x8024a105 오류 없이 업데이트를 설치할 수 있는지 확인합니다 . 그렇다면 SFC 스캔을 수행하여 누락 된 파일 또는 드라이버 문제를 해결하십시오.
방법 5 : 미디어 생성 도구를 사용하여 업데이트
경우에 따라 Windows가 업데이트 서버와의 적절한 연결을 설정할 수 없기 때문에 기본 Windows 업데이트 프로세스를 사용하여 컴퓨터를 업데이트하지 못할 수 있습니다. 따라서이 단계에서는 Windows Media Creation Tool을 배포하여 업데이트를 수행합니다. Windows를 업그레이드하기 위해 업데이트 파일을 자동으로 다운로드하고 설치합니다. 그에 대한:
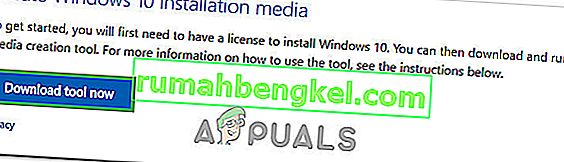
- 여기에서 Windows Media 작성 도구를 다운로드하십시오.
- 실행 파일을 실행하고 초기 설정을 위해 화면의 지시를 따릅니다.
- 초기 설정 후 "이 PC 업그레이드" 옵션을 선택하고 "다음"을 클릭합니다 .
- 사용 조건에 동의하고 설치 프로그램을 실행합니다.
- 이 도구는 이제 서버에서 업데이트 파일을 자동으로 가져와 사용 가능한 최신 버전으로 컴퓨터를 업데이트합니다.
- 이렇게하여 오류가 수정되었는지 확인하십시오.

방법 6 : 다운로드 폴더 삭제
새 업데이트를 다운로드하면 일반적으로 컴퓨터의 일부 폴더에 저장됩니다. 이 단계에서는 이러한 폴더 중 일부를 삭제하고 운영 체제에서 새 파일을 다운로드하라는 메시지를 표시합니다.이 메시지는 때때로 오류를 지울 수 있으며 업데이트가 정상적으로 적용됩니다. 그에 대한:
- Press “Windows” + “R” to open the Run prompt.
- Type in “Control Panel” and press “Enter” to launch the classical control panel interface.
- In the Control Panel, click on the “View By:” option and select “Large Icons” from the list.
- Click on the “File Explorer Options” and a new window should pop up.
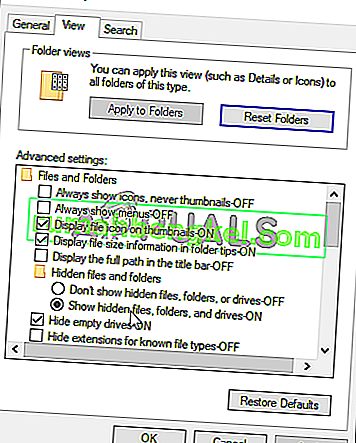
- In the File Explorer Options, click on the “View” button and then double click on the “Files and Folders” button to expand it.
- After that, double click on the ‘Hidden Files and Folders” to expand it as well.
- Check the “Show hidden Files, Folders and Drives” option and click on “Apply” to save your changes.
- Click on “OK” to close out of the window and press “Windows’ + “E” to launch the file explorer.
- In the File Explorer, delete the “$Windows.~WS” and “$Windows. ~BT” folders.
- Make sure to clear out the recycle bin as well so that they cannot be recovered.
- After this, press “Windows’ + “I” to launch settings and click on the “Update and Security” option.
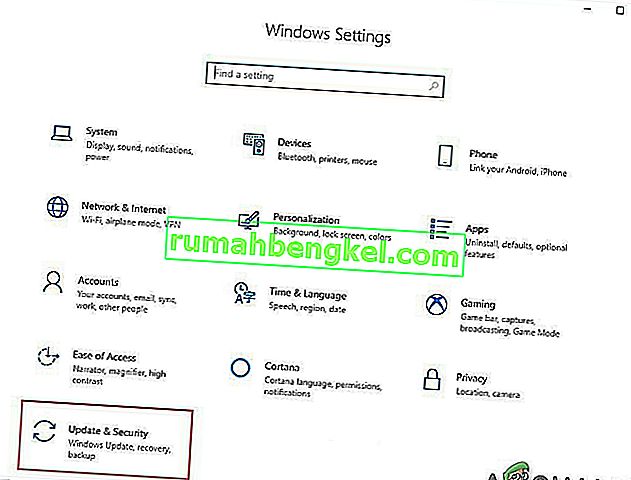
- In Update and Security, click on the “Windows Update” option on the left pane and then click on the “Check for Updates” button.
- Updates will now automatically be downloaded and installed.
- Check to see if the issue persists.


Method 7: Resetting Catroot2 Folder
In some cases, it is possible that the Catroot2 folder and its files have either been corrupted or they have been misconfigured due to which this issue is being triggered. Therefore, in this step, we will first be making some changes from the command prompt and then we will delete the files inside that folder. For that:
- Press “Windows’ + “R” to launch the run prompt.
- Type in “cmd” and then press “Shift” + “Ctrl” + “Enter” to provide administrative privileges.
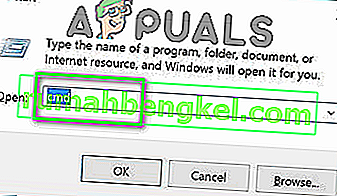
- Type in the following command and press “Enter” to execute it.
net stop cryptsvc
- After you have stopped the cryptsvc using the command above, type in the following commands into the command prompt one by one and press “Enter” after each to execute them on your computer.
md %systemroot%system32catroot2.old xcopy %systemroot%system32catroot2 %systemroot%system32catroot2.old /s
- After executing the commands stated above, we will be deleting all the files from the catroot folder without deleting the folder itself.
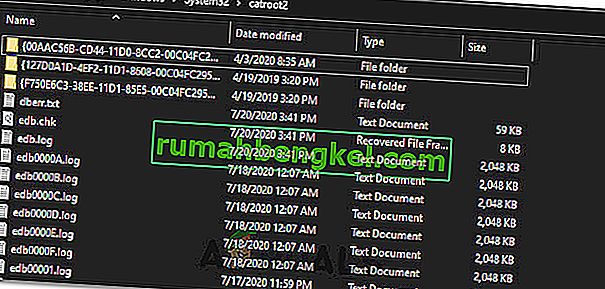
- Press “Windows’ + “R” to open the Run prompt and type in the following address to navigate to the catroot folder.
C:/Windows/System32/catroot2
- Press “Ctrl” + “A” once inside the folder to select all items inside it and press “Shift” + “Delete” to remove them from your computer.
- After removing these, confirm any prompts that might spring up on your screen.
- After that, open the command prompt back up and execute the following command.
net start cryptsvc
- Try to update your computer and check to see if the issue still persists.


Method 8: Configuring Services to Start Automatically
Sometimes, your computer might be preventing certain services from starting and functioning in the background due to which the update might not be properly installed or configured to be applied on your computer. Therefore, in this step, we will be setting up some services to startup automatically. For that:
- Press “Windows’ + “R” to launch the Run prompt.
- Type in “cmd” and press “Ctrl” + “Shift” + “Enter” to provide admin permissions.

- Type in the following commands one by one in the command prompt and press “Enter” after each to execute them.
SC Config wuauserv start=auto SC Config bits start=auto SC Config cryptsvc start=auto SC Config trustedinstaller start=auto
- This way, we will have configured these services to startup and run automatically in the background.
- Check to see if the issue persists.

Method 9: Re-register Windows Update and BITS Files
It is possible that some windows update files and Bits files might not be properly registered on your computer. Therefore, in this step, we will be re-registering these files on the computer and then we will check to see if that fixes our issue. For that:
- Press “Windows’ + “R’ to open the Run prompt.
- Type in “cmd” and then press the “Ctrl” + “Shift” + “Enter” buttons to provide admin permissions.
Type in the following commands one by one and press “Enter” after each to register the components.regsvr32.exe atl.dll regsvr32.exe urlmon.dll regsvr32.exe mshtml.dll regsvr32.exe shdocvw.dll regsvr32.exe browseui.dll regsvr32.exe jscript.dll regsvr32.exe vbscript.dll regsvr32.exe scrrun.dll regsvr32.exe msxml.dll regsvr32.exe msxml3.dll regsvr32.exe msxml6.dll regsvr32.exe actxprxy.dll regsvr32.exe softpub.dll regsvr32.exe wintrust.dll regsvr32.exe dssenh.dll regsvr32.exe rsaenh.dll regsvr32.exe gpkcsp.dll regsvr32.exe sccbase.dll regsvr32.exe slbcsp.dll regsvr32.exe cryptdlg.dll regsvr32.exe oleaut32.dll regsvr32.exe ole32.dll regsvr32.exe shell32.dll regsvr32.exe initpki.dll regsvr32.exe wuapi.dll regsvr32.exe wuaueng.dll regsvr32.exe wuaueng1.dll regsvr32.exe wucltui.dll regsvr32.exe wups.dll regsvr32.exe wups2.dll regsvr32.exe wuweb.dll regsvr32.exe qmgr.dll regsvr32.exe qmgrprxy.dll regsvr32.exe wucltux.dll regsvr32.exe muweb.dll regsvr32.exe wuwebv.dll
- After executing the commands listed above, check to see if the issue still persists.

Note: After trying the following fixes, if the issue still persists, try to perform a clean boot and check if that fixes it. If it does, update in the clean boot and then get out of it after the update is completed. If that doesn’t work, try to go for a clean install of Windows.