Windows 10의 검은 색 화면 문제는 일반적으로 업그레이드 후 또는 자동화 된 Windows Update가 시스템에 업데이트를 설치할 때 발생합니다. 이 검은 색 화면은 하드웨어 (GPU) 문제 일 가능성이 높기 때문에 다양한 설정을 평가하고 문제를 해결하여 진단하고 수정해야합니다.

요즘 PC는 사용량이 많은 여러 그래픽 카드를 사용하여 점점 더 발전하고 있습니다. 따라서 Intel의 온보드 그래픽 컨트롤러 이외의 그래픽 카드 를 사용하는 경우이 부팅 이 검은 색 화면 문제로 나타날 수 있습니다. 때때로 Windows는 시스템에 두 대의 모니터가 연결된 것처럼 인식합니다. 따라서 Windows는 출력 신호 를 블랙 스크린으로 로드합니다 .
광범위한 문제 해결을 시작하기 전에 몇 가지 기본 설정을 확인해야합니다. 여러 대의 모니터를 사용하는 경우 연결을 끊거나 다시 연결하고 기본 화면으로 테스트하십시오. 문제가 해결되면 당신은 운이 좋다. 아래 단계를 진행하지 않는 경우 :
방법 1 : 맹목적으로 수정
이 방법은 검은 화면에서 아무것도 볼 수 없으므로 맹목적으로 문제를 해결하는 것입니다.
- Windows가 검은 색 화면에서 멈 추면 흰색 마우스 커서 가 화면에 나타날 때까지 기다리십시오 . 마우스 패드를 움직여 그 존재를 확인할 수 있습니다.
- 커서가 화면에 나타나면 키보드 의 스페이스 바를 누르고 키보드에서 ctrl 키를 한 번 누릅니다 . 맹목적으로 로그인 비밀번호 또는 PIN 코드를 입력 합니다 (검은 색 화면에서는 볼 수 없음) . 자격 증명을 사용하여 Windows에 로그인합니다.
계정에 로그인 한 후 바탕 화면이 보이지 않고 검은 색 화면이 멈춘 경우 키보드에서 Win + P + 아래쪽 화살표 키 (Twice) 를 누르고 세부 정보를 다시 입력하십시오.
방법 2 : 전원주기
사용자가 분리 할 수있는 배터리가 장착 된 노트북이라면;
- 배터리를 꺼냅니다.
- 전원 어댑터를 분리합니다.
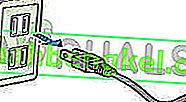
- 전원 버튼을 10 초 동안 길게 누릅니다.
- 전원 버튼을 놓습니다.
- 충전기를 다시 연결하고 전원을 켜십시오.

테스트하고 문제가 해결되었는지 확인합니다. 그렇지 않은 경우 방법 4로 진행하십시오.
방법 3 : 빠른 시작 해제
Windows 10은 빠른 시작 기능과 함께 출시되었습니다. 이름에서 알 수 있듯이 운영 체제를 빠르게 부팅 할 수 있으므로 작업을 재개하거나 빠르게 재생할 수 있습니다.
참고 : 빠른 시작 기능 은 시스템 종료 를 수행 한 다음 시스템 을 켤 때만 작동 하며 다시 시작 을 수행 할 때는 적용되지 않습니다 .
빠른 시작 옵션을 끄려면; 다음과 같이하세요Windows 10 설치 미디어를 사용하여 부팅합니다. BIOS에서 부팅 순서를 변경해야 할 수 있습니다.
참조 : 부팅 가능한 Windows 10 미디어를 만드는 방법
- 하단 의 컴퓨터 복구를 클릭하십시오.
- 문제 해결을 클릭하십시오
- 고급 옵션을 클릭하십시오.
참고 : 이 방법이 작동하지 않으면 "이전 버전으로 돌아 가기"를 클릭하고 화면의 지시를 따릅니다.
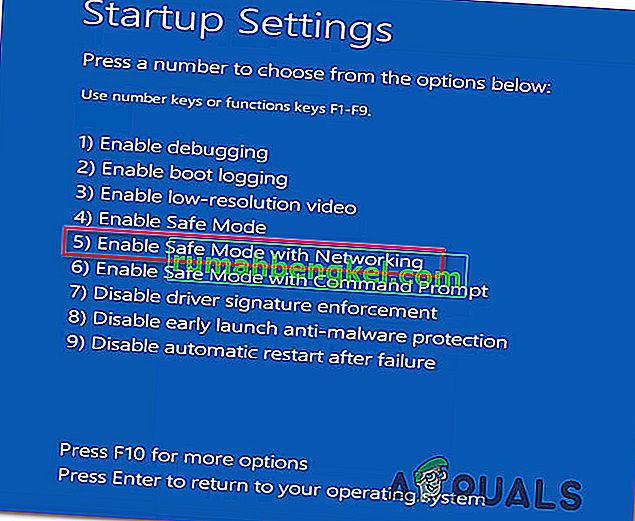
- 시작 설정을 클릭하십시오.
- 다시 시작을 클릭 하십시오.
- 네트워킹으로 안전 모드 선택
- PC가 제어판 으로 이동하기 시작하면 ;
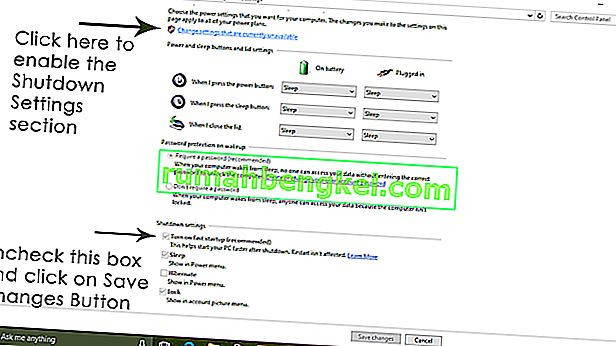
- 선택 전원 옵션을 ; 왼쪽 에서 전원 버튼이 수행하는 작업 선택을 선택 합니다 .

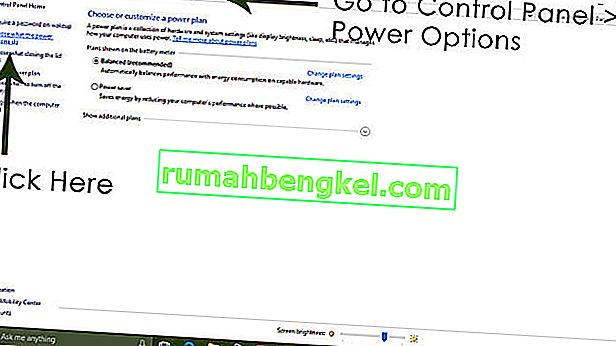
여기에서 아래로 스크롤하여 빠른 시작 옵션을 찾아 선택 취소 하십시오.
방법 4 : 디스플레이 어댑터 제거
검은 색 화면이 표시되는 경우 :
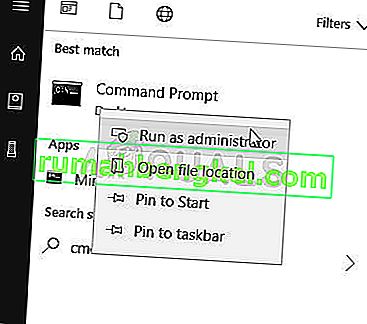
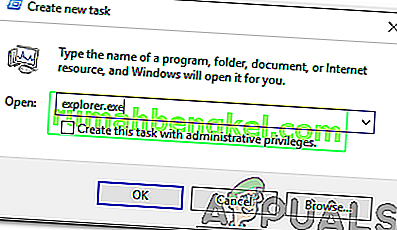
- 작업 관리자가 팝업되는지 확인 하려면 CTRL + ALT + DEL 키를 함께 누릅니다. 그렇다면 파일 -> 새로 만들기 ->를 클릭 하고 explorer.exe를 입력하십시오.
- 탐색기 창이 열리면; 로그인하여 바이러스 백신 소프트웨어 / 그래픽 카드를 제거한 다음 다시 설치하십시오.
참고 : 바이러스 백신을 제거하는 대신 일시적으로 비활성화하도록 선택할 수도 있습니다.
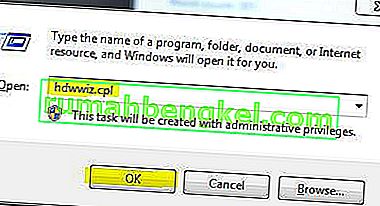
- 그래픽 / 디스플레이 어댑터를 제거하려면; CTRL + ALT + DEL이 성공하고 탐색기 창이 나타나면 win 키를 누른 상태에서 R을 누릅니다.
- 입력 hdwwiz.cpl을을 하고 확인을 클릭합니다
- 디스플레이 어댑터의 이름을 적어 둡니다.
- 디스플레이 어댑터 확장 -> 제거 선택


제거한 후 제조업체 사이트로 이동하여 최신 드라이버를 다운로드하십시오. 재부팅 및 테스트
방법 5 : 시스템을 공장 기본값으로 복원
이 방법은 모든 데이터를 지우고 컴퓨터와 함께 제공된 원래 운영 체제를 설치 / 설치합니다. 부패가 있기 때문에; 데이터가 중요하지 않은 경우 공장 기본값으로 복원 한 다음 Windows를 새로 설치할 수 있습니다. 이후에는 업그레이드 옵션이 더 이상 없을 수 있습니다.
공장 복원 지침은 시스템 설명서를 참조하십시오.
방법 6 : 컴퓨터 다시 시작하기
과거에 검은 화면 문제를 겪은 일부 Windows 10 사용자는 전원 버튼을 사용하여 컴퓨터를 끄고 다시 시작하기 만하면 문제를 해결했다고보고 했습니다. 이상하게 들릴지 모르지만이 솔루션은 확실히 가치가 있습니다.
방법 7 : GPU의 드라이버를 최신 버전으로 업데이트
Windows 10은 이전 버전의 Windows보다 큰 발전을 이루었 기 때문에 모든 GPU 제조업체는 새로운 운영 체제 용으로 특별히 설계된 완전히 새로운 드라이버를 만들어야했습니다. 업데이트 된 Windows 10 호환 드라이버가 컴퓨터에없는 것은 컴퓨터가 검은 색 화면 문제의 영향을받을 수있는 또 다른 원인입니다. 오래된 드라이버로 인해 검은 화면 문제가 발생하는 경우 컴퓨터 제조업체 또는 GPU 제조업체의 공식 웹 사이트로 이동하여 GPU 용 최신 드라이버를 다운로드하기 만하면됩니다 (두 위치 모두에서 사용할 수 있어야 함). 다운로드하는 드라이버가이 솔루션의 성공을 보장하기 위해 특별히 Windows 10 용으로 설계되었는지 확인하십시오.
방법 8 : 노트북의 연결된 밝기를 100 %가 아닌 다른 밝기로 변경
고급 그래픽 카드가 있고 Windows 8로 업데이트 된 랩톱에서 AC 전원 콘센트에 연결하면 검은 색 화면 문제가 종종 나타납니다. 그런 경우, 단순히 여는 경우 시작 메뉴를 검색, 고급 전원 설정 , 개방 고급 전원 설정을 하고를 제외하고 아무것도에 연결하면 노트북의 화면 밝기를 변경 100 % (도 99 % 할 것입니다) 검은 화면을 제거합니다 문제.
방법 9 : 그래픽 카드가 두 개인 경우 온보드 카드 비활성화
A decent fix for the black screen issue for people whose computers have tow graphics cards – the onboard graphics card that came with the computer and the graphics card that they have added to it (such as an Nvidia or AMD graphic card) – is to simply disable the onboard graphics card. Apparently, having two graphics cards on a Windows 10 computer can result in a clash that consequently gives birth to the black screen issue. If that is the case, simply going into Device Manager, expanding the Display adapters section, right-clicking on the onboard graphics card and clicking on Disable should fix the issue.
If you do not see your onboard graphics card in the Display adapters section, click on View in the top left of the Device Manager dialog and click on Show hidden devices. This will make your onboard graphics card (or, in some cases, cards) visible, and you can then right-click on it and click on Disable.
Method 10: Refresh your computer
The infamous black screen issue on Windows 10 can also be fixed by simply refreshing your computer. Refreshing your computer has almost entirely the same effect as resetting it to factory settings, with the exception of the fact that a refresh only deletes installed programs and applications and keeps your personal data whereas a reset gets rid of everything on your computer. To refresh a Windows 10 computer, you need to:
- Open the Start Menu.
- Click on Settings.
- Out of the array of different options provided, click on Update & Security.
- Click on Recovery in the left pane.
- In the right pane, click on the Get started button under the Reset this PC
- When provided with a choice to either keep your files or remove everything, click on Keep my files.

Method 11: Correcting User Shell
In some cases, the User shell might be preventing the user from being able to boot safely into their computer. In certain situations, the user shell configuration inside the registry might get corrupted due to which this black screen issue can occur. Therefore, in this step, we will be correcting this user shell entry. In order to do that, follow the steps below.
- Boot your computer and wait for the black screen to appear.
- Press “Ctrl” + “Alt” + “Del” and select the “Task Manager” option.
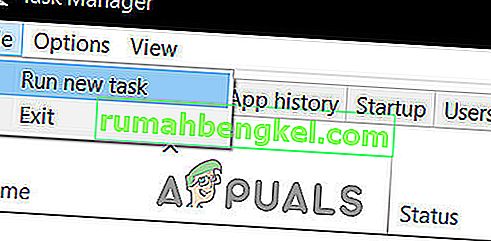
- Click on the “File” option on the top left of the task manager and select “Run New Task” from the list.
- Type in “regedit” and press “Enter” to open it.
Computer\HKEY_LOCAL_MACHINE\SOFTWARE\Microsoft\Windows NT\CurrentVersion\Winlogon
- Double click on the “Shell” entry on the right pane.
- Type in “Explorer.exe” in the Value data field and save your changes.
- Press “Ctrl” + “Alt” + “Del” again and click on the “Power Options” icon on the lower right side.

- Select “Restart” from the menu and wait for your computer to be restarted.
- Check to see if the issue persists after restarting the computer.


Method 12: Stopping Service
There is a specific service that prevents the computer from being able to function properly in some cases and stopping it can prevent the black screen issue from occurring. Therefore, in this step, we will be stopping this service. For that:
- Press “Ctrl” + “Alt” + “Del” and select the “Task Manager” option.
- Click on the “File” option on the top left of the task manager and select “Run New Task” from the list.
- Type in “services.msc” and press “Enter” to open it.
- Scroll through this list and look for the “RunOnce32.exe” or the “RunOnce.exe” entry. Also, do this same process for the “App Readiness” Service.
- Right-click on it and select “Stop”.
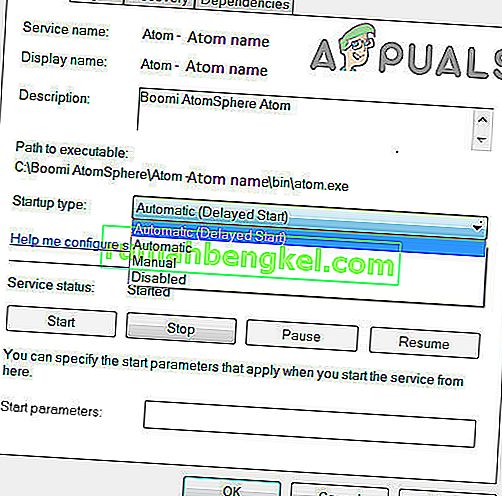
- Double click on it and change its startup type to “Disabled”.
- Wait for the service to be stopped completely and restart your computer.
- Check to see if the issue persists after stopping it completely.

Method 13: Renaming Files
In certain cases, the files in some Windows’ folders might have gotten corrupted due to which this black screen issue is being triggered. Therefore, in this step, we will be renaming these files and then check to see if the issue still persists.
- Press “Ctrl” + “Alt” + “Del” on the black screen.
- Click on the “Task Manager” option and then select “File”.
- Select the “Run New Task” option and then type in “cmd”.
- Type in the following command one by one for each file to rename it.
rename “(File Path) (File Name)” “(New Name)”
- Rename the following files to anything except their original names.
C:\ProgramData\Microsoft\Windows\AppRepository\StateRepository-Deployment C:\ProgramData\Microsoft\Windows\AppRepository\StateRepository-Deployment C:\ProgramData\Microsoft\Windows\AppRepository\StateRepository-Deployment C:\ProgramData\Microsoft\Windows\AppRepository\StateRepository-Machine C:\ProgramData\Microsoft\Windows\AppRepository\StateRepository-Machine C:\ProgramData\Microsoft\Windows\AppRepository\StateRepository-Machine
- Check to see if the issue persists after making these changes.
- If it still does, try the following code to just fix it.
cd "ProgramData\Microsoft\Windows\AppRepository" ren "StateRepository-Deployment.srd" "StateRepository-Deployment-Corrupted.srd" ren "StateRepository-Deployment.srd-shm" "StateRepository-Deployment-Corrupted.srd-shm" ren "StateRepository-Deployment.srd-wal" "StateRepository-Deployment-Corrupted.srd-wal" ren "StateRepository-Machine.srd" "StateRepository-Machine-Corrupted.srd" ren "StateRepository-Machine.srd-shm" "StateRepository-Machine-Corrupted.srd-shm" ren "StateRepository-Machine.srd-wal" "StateRepository-Machine-Corrupted.srd-wal"
- Check to see if the issue persists.
Method 14: Replacing Profile Cache
It is possible the Profile cache for your current user account has either gone missing from some locations or it has been corrupted in certain locations due to which this issue is being triggered. Therefore, in this step, we will be replacing this profile cache after copying it from a location. For that:
- Create a new user account before doing so and log into that.
- Restart your computer in safe mode.
- Log in to your new profile.
- Navigate to the following location and copy the folder named “caches”.
C:\Users\{working-user-profile-name}\AppData\Local\Microsoft\Windows\Caches - Paste this folder in the following location.
C:\Users\{broken-user-profile-name}\AppData\Local\Microsoft\Windows\Caches. - Check to see if the issue persists.
Follow the onscreen instructions and dialogs, and once you are done, your computer will have been refreshed and the black screen issue will be no more.
You can further try to:
- Boot your computer in safe mode and check if the issue persists over there. This will help you to isolate these issues from a specific app that is causing it.
- Press “Windows” + “P” to switch displays that might fix this.
- Update your Bios
- Disconnect the Second monitor
- Try to use an HDMI cable for connection instead of a DVI or VGA one.
- When in the black screen, press the “Windows’ + “Ctrl” + “Shift” + “B” keys to refresh the Graphics Driver.
- You can also try to perform a Startup Repair.
- Try to create a new user account using the last methods listed in this article.
- SFC 및 DISM 스캔을 수행하십시오.