Steam 오버레이는 게임을 플레이하는 동안 Steam에 액세스하는 데 사용됩니다. 친구를 초대하고, 메시지를 보내고, 가이드를 찾고, 메시지에 답장하는 등의 작업을 할 수 있습니다. 또한 어떤 친구가 온라인 상태인지 확인하고 게임을 플레이하도록 초대 할 수 있습니다. 창을 변경하는 대신 모든 게임 내에서 Steam에 액세스 할 수 있기 때문에 매우 유용한 도구입니다.
많은 사람들이 Steam 오버레이가 작동을 멈추고 빡빡한 상황에 놓이는 문제를 경험합니다. 사용자의 하드웨어 및 소프트웨어 구성에 따라 문제가 다르기 때문에이 문제에 대한 단일 솔루션은 없습니다. 테스트 할 수있는 여러 솔루션을 나열했습니다. 내림차순으로 시도하고 메시지가 표시되지 않는 한 어떤 솔루션도 건너 뛰지 마십시오.
솔루션 1 : 관리자 액세스 권한 부여
Steam 오버레이가 작동하지 않는 가장 큰 이유는 프로그램에 관리자 액세스 권한이 없기 때문일 수 있습니다. 많은 컴퓨터에서 이것은 Steam을 설치할 때 기본 옵션입니다. 실행 파일을 탐색하고 관리자 권한을 부여하는 방법을 안내합니다.
- Steam 디렉토리를 엽니 다. 기본 위치는 C : \ Program Files (x86) \ Steam입니다. 또는 Steam을 다른 디렉토리에 설치 한 경우 해당 디렉토리를 탐색 할 수 있습니다.
- " Steam.exe " 라는 파일을 찾습니다 . 이것이 메인 Steam 런처입니다. 그것을 마우스 오른쪽 버튼으로 클릭하고 속성을 선택하십시오 . 화면 상단에서 호환성 탭을 선택합니다 . 여기 창 하단에“ 이 프로그램을 관리자 권한으로 실행 ”이라는 확인란이 표시됩니다 . 체크되어 있는지 확인하십시오. 변경 사항을 저장하고 종료합니다.

- 이제 " GameOverlayUI.exe " 라는 파일을 찾습니다 . 마우스 오른쪽 버튼을 클릭하고 속성을 선택 합니다 . 화면 상단에서 호환성 탭을 선택합니다 . 여기 창 하단에“ 이 프로그램을 관리자 권한으로 실행 ”이라는 확인란이 표시됩니다 . 체크되어 있는지 확인하십시오. 변경 사항을 저장하고 종료합니다.

- Steam을 다시 시작하고 게임을 플레이하는 동안 Steam 오버레이가 작동하는지 확인하세요.
- 그렇지 않은 경우 때때로 결함이 발생할 수 있으므로 해당 게임을 관리자로 실행하고 있지 않은지 확인하십시오.
- 게임 폴더로 이동하여 실행 파일을 마우스 오른쪽 버튼으로 클릭하고 "속성"을 선택합니다.
- 호환성 탭에서 관리자로 실행하도록 설정되어 있지 않은지 확인하십시오.
해결 방법 2 : Steam 오버레이 활성화
Steam에는 Steam 오버레이를 활성화하는 옵션이 있습니다. 해당 옵션이 활성화되지 않았기 때문에 오버레이가 작동하지 않을 수 있습니다. 활성화하고 Steam을 다시 시작하여 문제가 해결되었는지 확인할 수 있습니다.
- Steam 클라이언트를 엽니 다.
- 창의 왼쪽 상단에있는 Steam 이라는 옵션을 클릭합니다 . 드롭 다운 상자에서 설정 을 선택 하여 설정 인터페이스를 엽니 다.
- 설정이 열리면 화면 왼쪽에있는 게임 내 탭을 클릭합니다 . 여기에 " 게임 내에서 Steam 오버레이 활성화 "라는 확인란이 표시 됩니다. 체크되어 있는지 확인하십시오. 올바른 오버레이 바로 가기 키를 누르고 있는지 확인할 수도 있습니다. 원하는 경우 변경할 수도 있습니다.

- 이제 창 상단 에있는 라이브러리 탭을 클릭합니다 . 컴퓨터에 설치된 게임이 여기에 나열됩니다. 오버레이가 작동하지 않는 게임을 마우스 오른쪽 버튼으로 클릭하고 속성을 선택 합니다.
- 여기에 " 게임 내에서 Steam 오버레이 활성화 "라는 다른 확인란이 표시 됩니다. 체크되어 있는지 확인하십시오.

- Steam을 다시 시작하고 원하는 게임에서 오버레이가 작동하는지 확인하십시오.
해결 방법 3 : 기본 게임 폴더에서 열기
또 다른 해결책은 설치 폴더에서 직접 플레이중인 게임을 여는 것입니다. Steam 오버레이를 비활성화하는 Steam 런처에서 게임을 실행하면 버그가있을 수 있습니다.
- Steam 디렉토리를 엽니 다. 기본 위치는 C : \ Program Files (x86) \ Steam입니다. 또는 Steam을 다른 디렉토리에 설치 한 경우 해당 디렉토리를 탐색 할 수 있습니다.
- 다음 폴더로 이동
Steamapps
- 이제 PC에 설치된 다른 게임을 볼 수 있습니다. Steam 오버레이가 작동하지 않는 게임을 선택하세요.
- 게임 폴더 안에있을 때 " game " 이라는 폴더를 엽니 다 . 폴더 안에있을 때 " bin " 이라는 다른 폴더를 엽니 다 . 이제 win32 및 win64 라는 두 개의 폴더가 표시됩니다 . 컴퓨터에 32 비트 구성이있는 경우 win32를 열고 a64 비트 구성이있는 경우 win64를 엽니 다.
최종 주소는 다음과 같습니다.

- 여기에 "dota2.exe"와 같은 게임의 기본 런처가 있습니다. 마우스 오른쪽 단추로 클릭하고 관리자 권한으로 실행 옵션을 선택 하십시오 . 게임이 시작되면 Steam 오버레이가 작동하는지 확인하세요.
해결 방법 4 : 타사 응용 프로그램 비활성화
Fraps 또는 Razer Synapse와 같은 타사 응용 프로그램은 Steam 오버레이에 액세스하려고 할 때 문제를 일으킬 수 있습니다. 그 이유는 이러한 응용 프로그램이 실행 중일 때 시스템 오버레이를 제어해야하기 때문입니다. 시스템 / 화면 오버레이는 플레이중인 게임과 타사 애플리케이션에서 공유합니다. 다른 애플리케이션 (Steam 오버레이)이 액세스를 시도하면 이미 다른 두 사람이 사용하고 있기 때문에 액세스 할 수 없습니다. 가장 좋은 방법은 게임을 플레이 할 때 비활성화하고 Steam 오버레이를 다시 여는 것입니다.
- 해당 옵션에서 해당 응용 프로그램을 직접 닫거나 Windows + R 을 눌러 실행 응용 프로그램을 표시 할 수 있습니다 .
- 대화 상자에 " taskmgr "을 입력 하여 작업 관리자를 불러옵니다.

- 이제 프로세스 목록에서 실행중인 모든 타사 응용 프로그램을 삭제하고 닫습니다. Steam을 다시 시작하고 오버레이가 작동하는지 확인하십시오.
참고 : 네트워킹과 함께 안전 모드에서 사용을 시도하고 문제가 해결되는지 확인할 수도 있습니다.
해결 방법 5 : PC 다시 시작
많이 보이지는 않지만 PC를 다시 시작하면 문제를 해결할 수 있습니다. Steam이 백그라운드에서 업데이트되고 업데이트가 설치된 경우 일 수 있습니다. 이러한 새로운 업데이트로 인해 PC를 다시 시작하여 업데이트에 적용한 모든 변경 사항을 적용 할 때까지 전체 기능 (Steam 오버레이 실행)을 수행하지 못할 수 있습니다. 컴퓨터를 다시 시작하고 관리자 권한으로 Steam을 실행하고 게임을 플레이 할 때 Steam 오버레이가 작동하는지 확인하세요.
해결 방법 6 : 로컬 게임 파일 및 라이브러리 파일 확인
게임 파일이 손상되었거나 일부 게임 파일이 누락 된 경우 일 수 있습니다. 이 때문에 Steam 오버레이가 게임에서 열리지 않습니다. 라이브러리 파일이 잘못된 구성으로되어있어 Steam 오버레이에 버그가 발생할 수 있습니다.
- Steam 클라이언트를 열고 상단에있는 라이브러리를 클릭하세요 . 여기에 설치된 모든 게임이 나열됩니다. Steam 오버레이가 열리지 않는 게임을 선택하십시오.
- 오류가 발생한 게임을 마우스 오른쪽 버튼으로 클릭하고 속성을 선택 합니다.
- 속성에서 로컬 파일 탭으로 이동하여 게임 파일 무결성 확인 옵션을 클릭합니다 . Steam은 메인 매니페스트에 따라 존재하는 모든 파일을 확인하기 시작합니다. 누락 / 손상된 파일이있는 경우 해당 파일을 다시 다운로드하고 그에 따라 교체합니다.

- 이제 화면 왼쪽 하단에있는 Steam을 클릭 한 후 설정 옵션 을 눌러 설정으로 이동합니다 . 설정 에서 인터페이스 왼쪽에 있는 다운로드 탭을 엽니 다 .
- 여기에“ Steam Library Folders ”라고 쓰여진 상자가 있습니다. 클릭하세요

- All your steam content information will be listed. Right-click on it and select “Repair Library Files”.

- Restart Steam and open it using Run as administrator
Solution 7: Checking your Firewall and Antivirus
It is a very common reality that your firewall and antivirus software conflicts with Steam. Steam has a lot of processes going on at once to ensure that your gaming experience is nothing but the best. However, many antivirus software marks these processes as potential threats and quarantine them resulting in some processes/applications not working. We have put together a guide on how to put steam as an exception in antivirus.
For disabling the Windows Firewall, follow the steps listed below.
- Press Windows + R button to bring up the Run application. In the dialogue box type “control”. This will open your computer’s control panel in front of you.

- On the top right there will be a dialogue box to search. Write firewall and click on the first option that comes as a result.

- Now at the left side, click the option which says “Turn Windows Firewall on or off”. Through this, you can turn your firewall off easily.

- Select the option of “Turn off Windows Firewall” on both the tabs, Public and Private Networks. Save changes and exit. Restart Steam and launch it using the option Run as administrator.

Solution 8: Checking for Windows updates
As we all know, Steam keeps its client up to date with all the latest upgrades and developments of any operating system. It adapts its functions and options accordingly. If Steam gets updated for that new change in your OS, and your OS isn’t upgraded on your side, it may cause Steam not to function properly. As a result, your Steam overlay won’t launch when you are playing any game. Follow the steps listed below to check for potential updates and install them accordingly.
- Open your Start menu and in the dialogue box type “Settings”. Click on the first results that come. This will open the Settings application.
- Once in the Settings application, you will see a number of options. Browse through them until you find the one named “Update and Security”.

- Once in the Update and Security settings, you will see an option that says Check for updates. Click it and Windows will check for the updates available. It will download them and ask before installing them. Then it may require a computer restart. Save your work before restarting. After it has restarted, launch the Steam client using the option of Run as administrator and check whether the Steam overlay is working or not.

Note: You can also check manually for updates if automatic-check fails.
Solution 9: Disabling gameoverlayui.exe
Gameoverlayui.exe is not essential for the Windows OS. Disabling it causes relatively no problems. It is located in the subfolder of C:\Program Files. It signed by Verisign and has no information regarding its developer. It is also not a Windows system file so you don’t have to worry about it causing any unexpected errors. Disabling this process sometimes fixes the issue of Steam overlay not working. Follow the steps listed below to disable it from task manager.
- Press Windows + R button to bring up the Run application. In the dialogue box type “taskmgr” to launch the task manager.
- Browse to processes and scroll until you find the one named “gameoverlayiu.exe”. Disable it and check if the Steam overlay is working. You may have to restart Steam and run it using the Run as administrator option.

Solution 10: Deleting GameoverlayUI
Before we reinstall Steam and its components, it’s worth a shot to delete the GameoverlayUI application and checking the problem gets fixed. Note that you don’t have to delete it permanently. You can always retrieve it using the Recycle Bin.
- Open your Steam directory. The default location of it is C:\Program Files (x86)\Steam. Or if you installed Steam in another directory, you can browse to that directory and you will be good to go.
- Search for “GameOverlayUI.exe”. Delete it. Restart Steam and open it using Run as administrator. Check if the problem gets fixed. If it doesn’t work, you can restore the deleted file from the Recycle Bin.

Solution 11: Enabling Overlay for Specific Game
In certain cases, the overlay might’ve been disabled for one specific game due to which it is not showing up in that game. In order to change this, we will open the properties for that game and change its configurations. For that:
- Launch Steam and sign in to your account.
- Click on “Library” and then right-click on the game with which you are facing this issue.
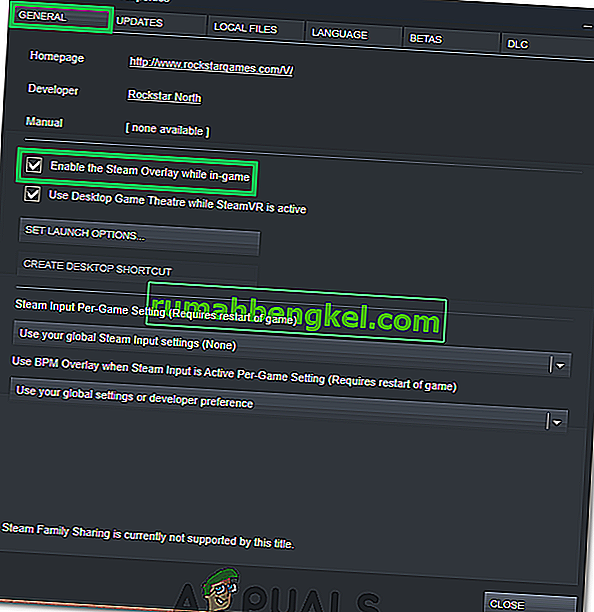
- Click on the “General” tab and check the “Enable In-Game Overlay” option.
- Check to see if the issue still persists.

Final Solution: Refreshing Steam files
If the error still persists at this stage, we have no choice but to refresh Steam files. Refreshing Steam files will reinstall Steam on your computer again. We will delete some of the configuration folders to ensure that they get renewed upon the installation and all the bad files get removed.
Please note that any interruption during the copy process will corrupt the files and you will have to re-download the entire content over again. Only proceed with this solution if you are sure that your computer won’t be interrupted.
- Navigate to your Steam directory. The default location for your directory is
C:/Program Files (x86)/Steam.
- Locate the following files and folders:
Userdata (folder) Steam.exe (Application) Steamapps (folder- only preserve the files of other games in it)
The user data folder contains all the data of your gameplay. We don’t need to delete it. Furthermore, inside Steamapps, you will have to search for the game that is giving you the problem and only delete that folder. The other files located contain the installation and game files of other games you have installed.
However, if all the games are giving you problems, we suggest that you skip deleting the Steamapps folder and proceed with the following step.

- Delete all other files/folders (except the ones mentioned above) and restart your computer.
- Re-launch Steam using administrator privileges and hopefully, it will start updating itself. After the update is complete, it will run as expected.